There are two main types of kernel module: static and loadable. The static modules are added into the kernel as its compiled. Loadable modules, on the other hand, are dynamic, and they’re loaded/unloaded during runtime. When loaded, they pretty much become part of the kernel.
There are two locations in the file system to note:
- /lib/modules is where the kernel modules are stored. There are subdirectories for the different types.
- /etc/modules lists the modules to load during system boot.
A standard Linux installation also ships with something called modutils, that is a group of programs for manipulating loadable kernel modules (LKMs):
- insmod: Load module
- rmmod: Unload module
- depmod: Find dependencies
- kerneld: Kernel daemon
- ksyms: Show exported symbols
- lsmod: List loaded modules
- modinfo: Show module information
- modprobe: Load module and resolve dependencies
But these can only be used with whatever’s already in the file system.
Writing the Module
The concept is simple: we merely write a C program, compile it, then use the insmod command. A simple ‘Hello World’ program is all we need to get things going, as the learning curve here is in getting our own module successfully loaded.
First we might need to install kernel headers, or
kernel-dev, from the distribution’s repository. Other tutorials recommend compiling and running from the most recent kernel.
The following is an edited ‘Hello World’ example from The Linux Documentation Project:
				#include  /* Needed by all modules */
				#include  /* Needed for KERN_INFO */

				int init_module(void)
				{
					printk(KERN_INFO "Hello world 1.\n");

					*/ Non-0 return if init_module failed;*/
					return 0;
				}

				void cleanup_module(void)
				{
					printk(KERN_INFO "Goodbye world 1.\n");
				}
We might think the next step is a matter of putting the code in an IDE, clicking compile/build, then loading the resulting object file. Unfortunately it’s not that simple. If we try, the compiler will throw up an error because it can’t find the headers to include. Also, the compiler links code to whatever objects are available in the standard library, and the objects for this module aren’t available until it’s loaded into kernel space.
Instead, we use a ‘makefile’. Create a new directory (here I’ve called it ‘
MyModule‘). This will contain
mymodule.c and the makefile. Next, open a new file in the IDE or text editor, then add the following:
obj-m += mymodule.o
all:
make -C /lib/modules/$(shell uname -r)/build M=$(PWD) modules
clean:
make -C /lib/modules/$(shell uname -r)/build M=$(PWD) clean
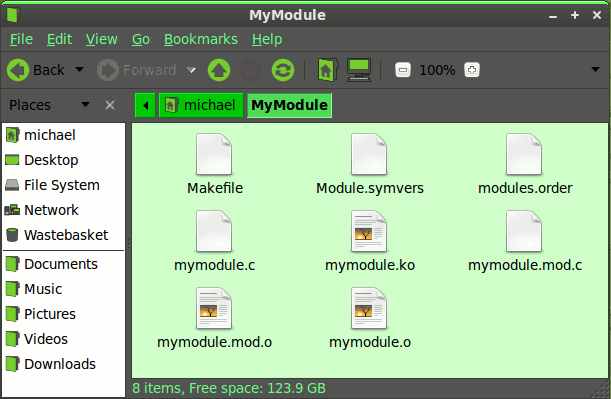
Save this as ‘Makefile‘, in the directory that was just created. Now that directory will contain mymodule.c and Makefile. The next step is to build this using ‘
make‘. The directory should now be populated by the newly-created module and several other files (.zip archive here). The module here is
mymodule.ko.

The next step is to load mymodule.ko into the kernel’s memory space using
insmod() as root.
$su root
#insmod mymodule.ko
Since I used ‘
printk‘ and not ‘
printf‘, nothing was printed to the screen. How can we determine whether it was successfully loaded? Use
lsmod, of course. And by checking syslog, we should find that the module has indeed printed a kernel message.
#cd /var/log
#cat syslog
The entry looking something like:
Sep 29 23:12:05 BEATRIX kernel: [19161.607371] Hello world 1.
And that’s it. The module doesn’t do much, but the important thing is we managed to create a module and load it.
 The next step is to load mymodule.ko into the kernel’s memory space using insmod() as root.